
Getting Started
One of the many functions you may be performing from within the StaffGlass application is setting up drug, dna, or background screenings for applicants or employees. StaffGlass’ unique interface has made ordering a service extremely streamlined and efficient; setting up a screening only takes a few clicks.
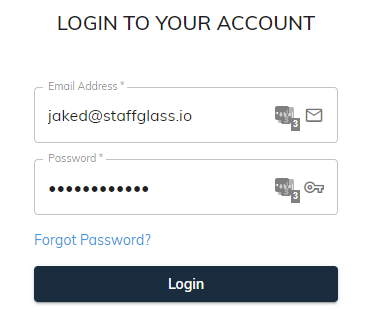
To begin, you’ll need to log into the StaffGlass application. To do this, visit the StaffGlass app, then enter your credentials and submit.
Once you are logged in, you will be directed to the StaffGlass People Page. On this page, you can add, remove, and edit the people currently in your organization. The interactive table has many useful features such as smart filtering, support for live data updates, and more. In our case, we are trying to order a drug test, so we will focus on that.

The Service Ordering Page

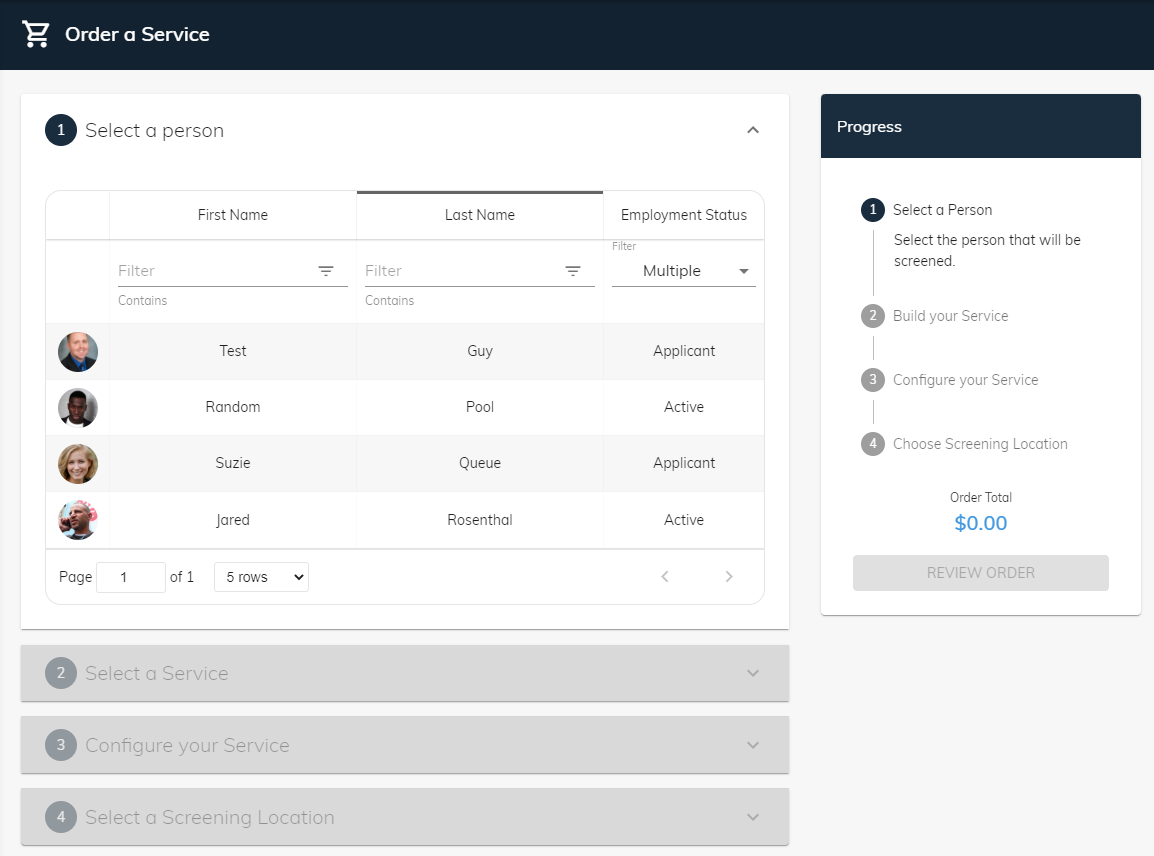
This is the Health Street Service Order page. On this page, we will select who will be tested, what service they will receive, configure the service options, and select the location where the screening will take place. Just to play around a bit, select anybody in the list by clicking on their row in the table. We will click on Suzie Queue.

Note that the person selection step is now marked as complete in the progress stepper on the right hand side, and the next step has automatically been opened. If we were to continue, you would select one of the five categories of tests Health Street provides, but for now, we are going to take a quick step back.
Ordering a Service
Most of the time, when you want to order a service, you will already know who is being tested. There is a much better way to get to the service ordering page than typing in the web address from the previous section.
Selecting a Person to Test
If you navigate to the People Page again, you will again see the list of employees and applicants in your organization.

On the right hand side, you can see the list of people in your organization. On the left hand side, there is a list of Actions that can be performed on this page. Let’s start by clicking the Drug Test button within the Actions list.
This has taken us back to the Service Order page, great! No need to manually type in a web address to get here. But there’s a bonus: since we clicked the Drug Test button just a moment ago, the service configuration page has pre-selected the Drug Testing category for us. Choose a person again to see what has changed. We will again select Suzie Queue.
Selecting a Service
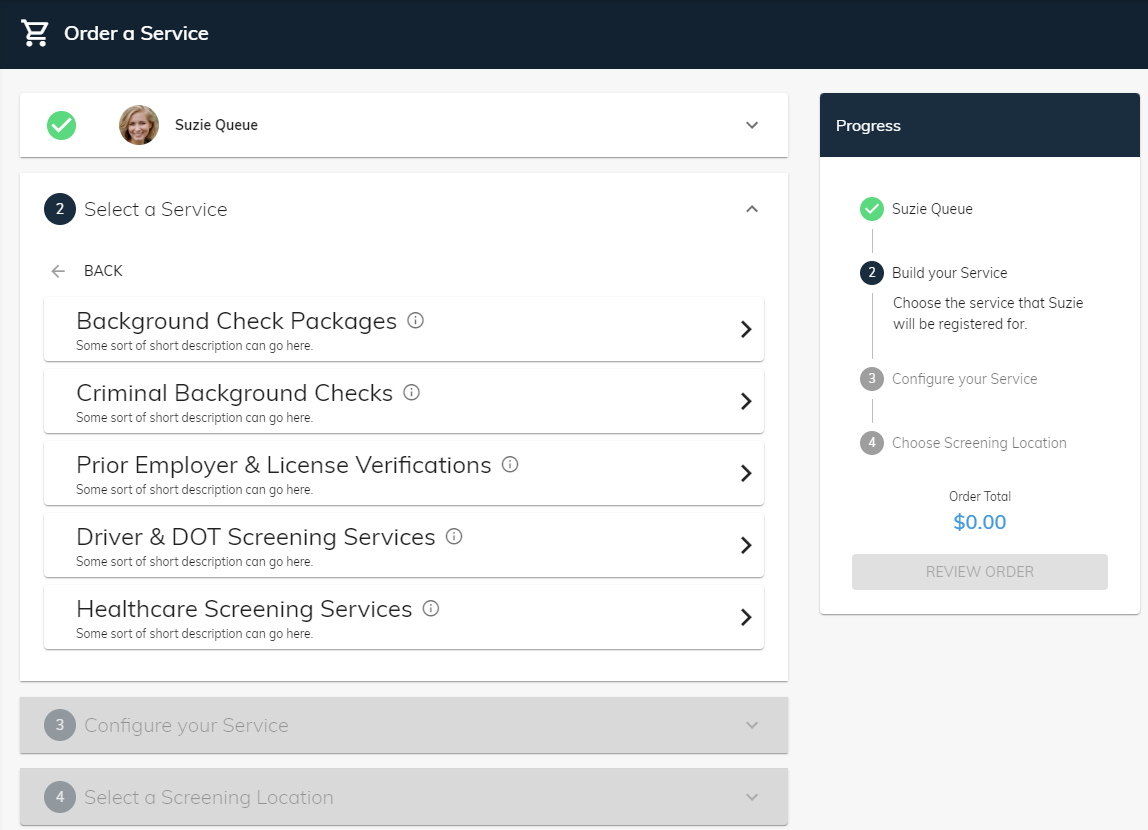
Now that our person has been selected, we are going to select our desired service. You should see the “Select a Service” has automatically been selected.
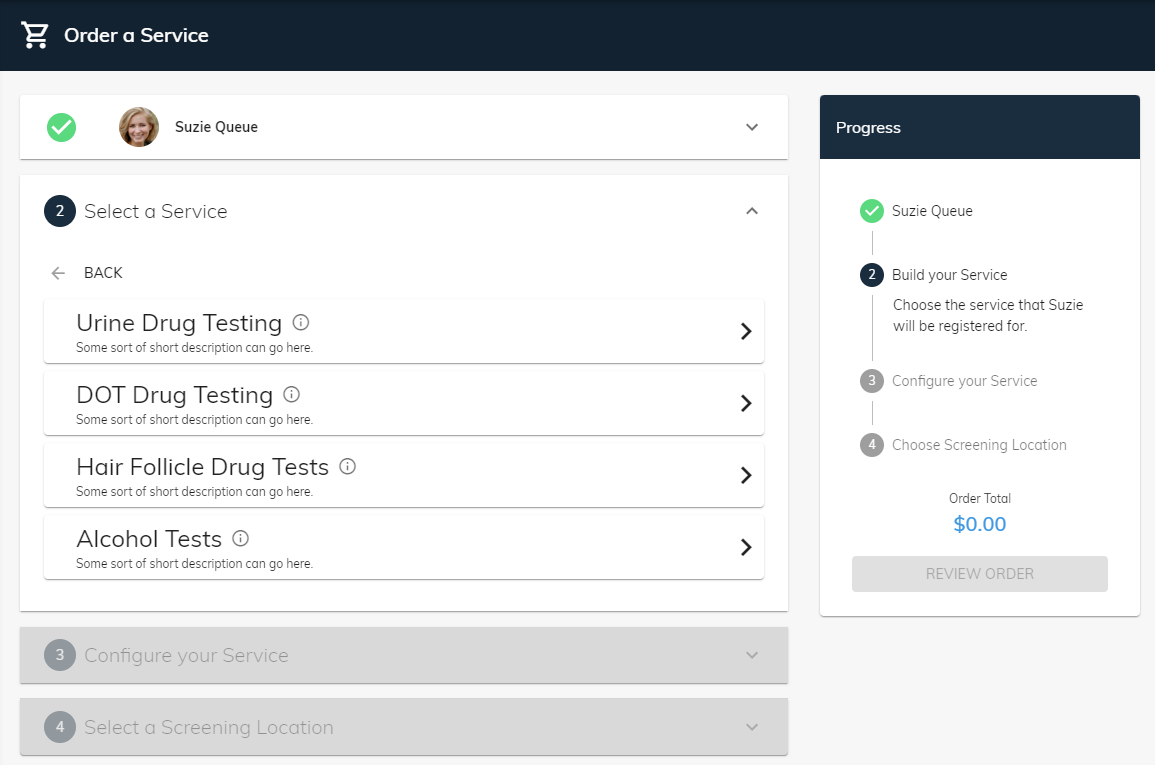
You can see that the Drug Testing category has already been chosen, and now we can directly select which type of Drug Test is needed. Please note: You can always click the BACK button to select a different type of screening.
Now we must finish selecting the type of service we wish to order. For the purposes of this example, we will choose Hair Follicle Drug Tests, and then 8 Panel Hair Test.

Configuring our Service
Now that we’ve selected our service, the progress stepper will again update, and the next step in the process will automatically open. This step is the Service Configuration step.

Depending on what screening service was selected, this window can vary significantly. This step is where specific options and features regarding the service can be added or altered. There’s a lot of possibilities here, but for the purposes of this example, we will select Random under Reason for Hair Test, and we will add the Report Quantitative Levels (positives only) feature on the right hand side. We will double check our selections, and then click Next.

Selecting a Testing Location
Now we have arrived at the final step in the ordering process. Here, we must choose the location in which this person will be tested.

To begin selecting a location, start typing into the box that says “Enter a location”. We recommend using the name of the city closest to the desired point of testing. For our example, we will search for clinics in the Cleveland, Ohio area.
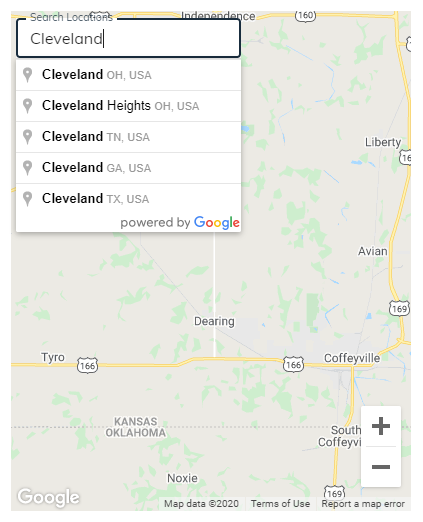
Once the dropdown displays the location you are looking for, select it by clicking on it. You can also just hit Enter, which will select the location first on the list.
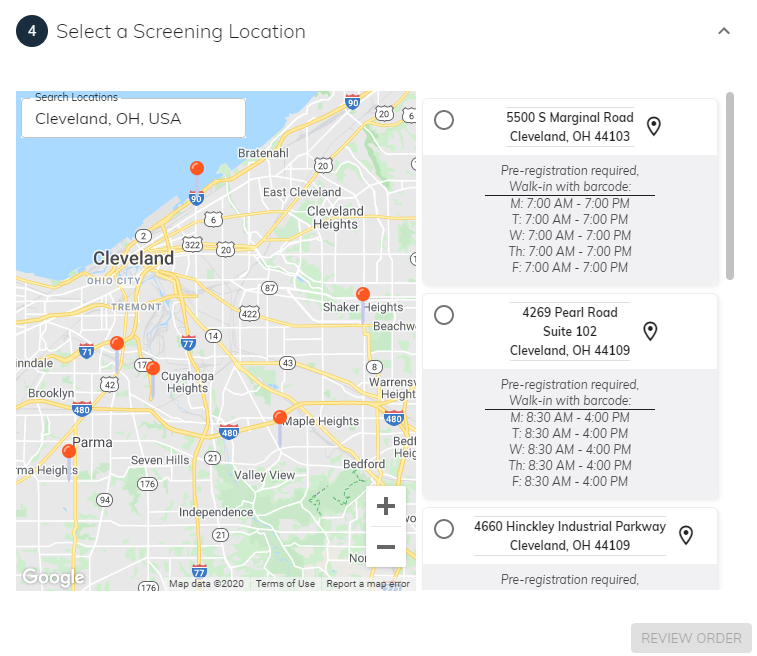
Now we can see a list of testing locations for this service. To select a location, either click on the pin on the map corresponding to the location, or scroll through the list on the right hand side and click on the location in the list. Note that the currently selected location is highlighted blue in the list on the right hand side, and the pin on the map has also been highlighted in blue.

When you have confirmed the testing location, click Review Order.
This takes us to the Review page. Here, we can get a quick glance at all of the selections we’ve made up to this point to ensure that everything looks correct.
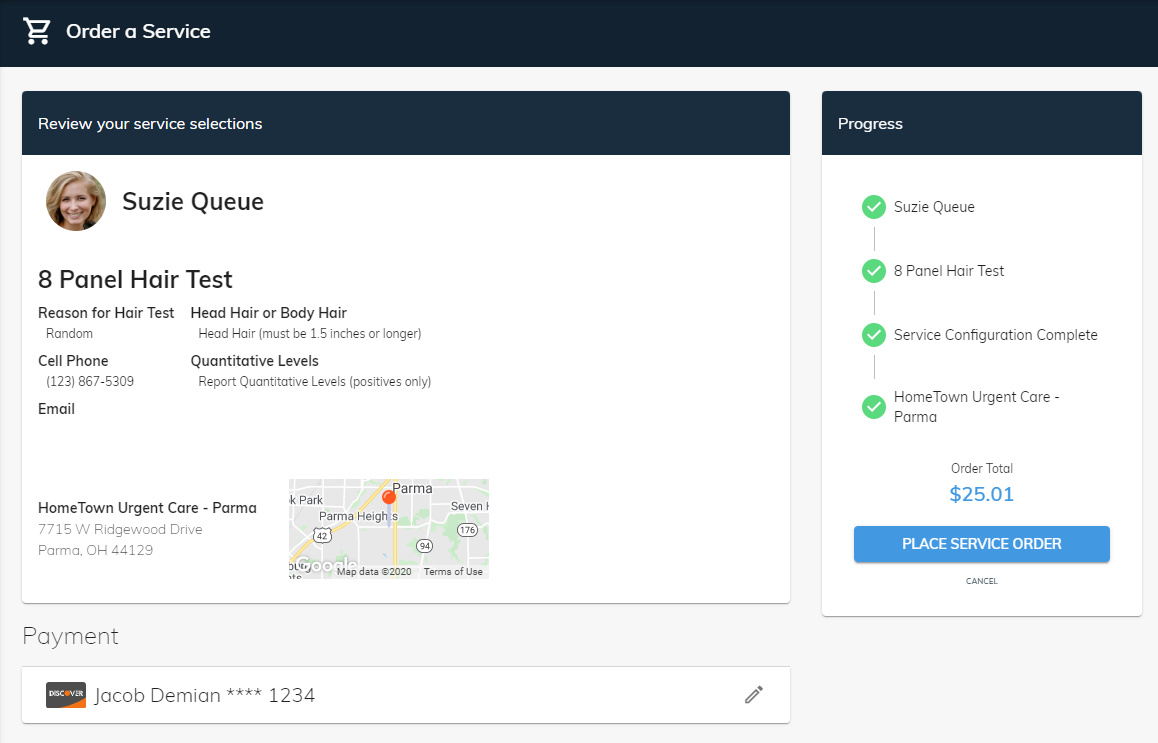
This is also where you can select your desired method of payment. If you wish to change payment methods, click on the pencil icon on the right hand side of the payment panel, and then click on the card that you wish to use.
Once you have verified the correct configurations for your service order, and selected your desired payment method, you can place the order by clicking the Place Service Order button on the right hand side.
After a few seconds, you should see a success message at the top of the screen that says “Your order has been placed!”

The service has now been ordered, and your work is done! With only a few clicks on the mouse, we’ve set up a Hair Drug Test for a company applicant in just minutes. Your work here is done! 🙂
Pre-selecting a Person and a Service Category
There are numerous ways to begin the process of placing a service order. In the example above, we navigated to the People page and then clicked on the Drug Test action button. However, if you already know which person you want tested, you can click the checkbox on their row in the table before selecting an action button.

For this example, we have selected Suzie Queue, and we will then click on the Background Check action button (Bknd Chk).
Note that this has not only automatically selected the Testing Category as before, but it has also already set Suzie Queue as the person we wish to test! This has completely bypassed the first step of the ordering process, making ordering a service even more efficient.
Ordering a Test from a Profile Page
A service order can also be started from someone’s profile page. The profile page is where an employee/applicant’s details can be reviewed or modified.
To reach the profile page, first navigate to the people page.

Click on the row corresponding to the person whose profile you wish to view. This will navigate you to that person’s profile page.
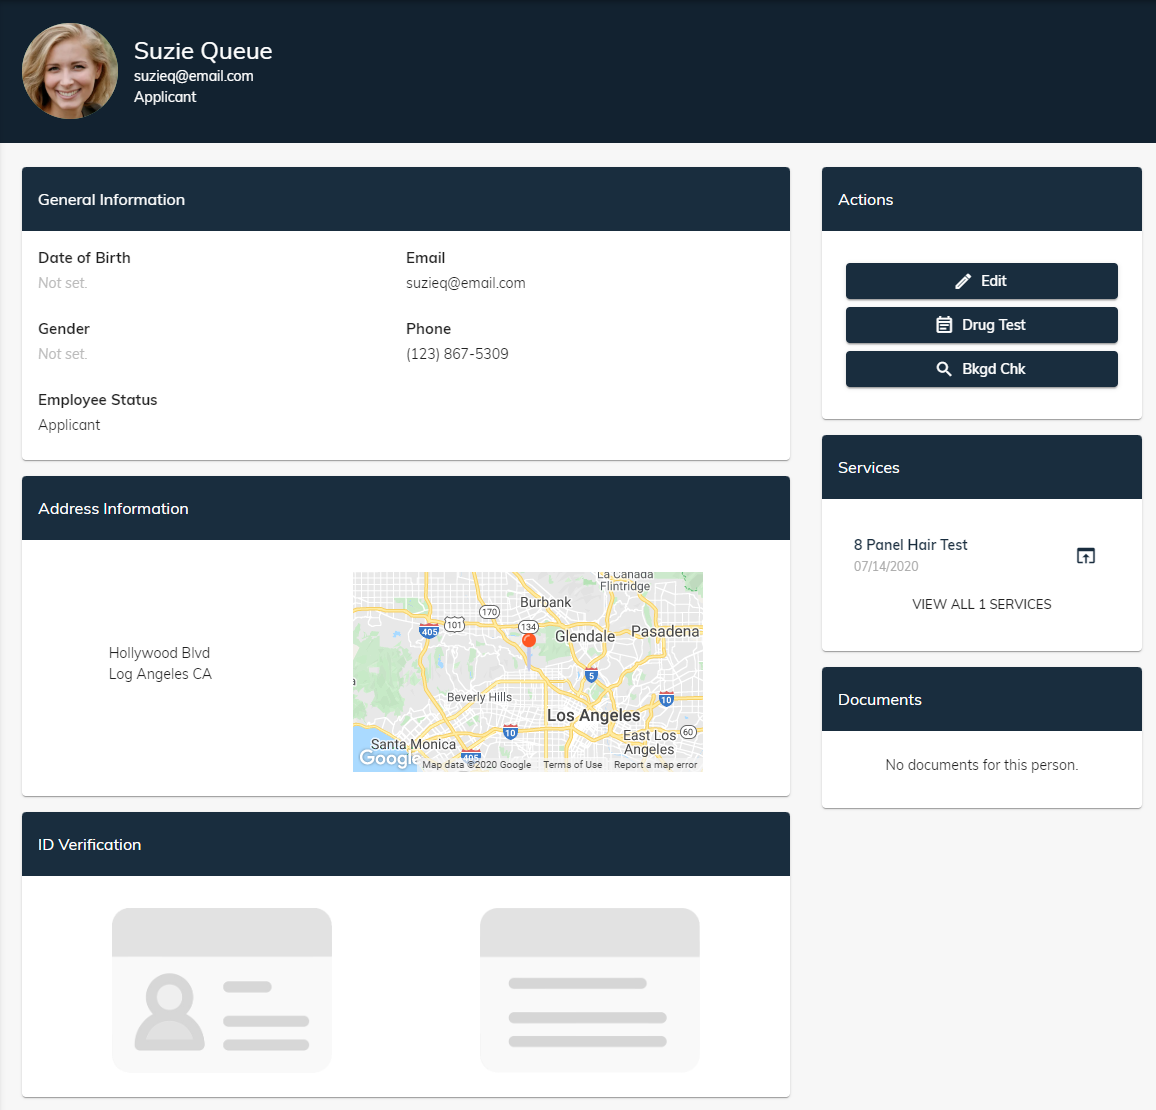
Note on the right hand side, there is another list of action buttons very similar to the people page. For testing purposes, click on the Drug Test button. You will see that this has again sent you to the Service Order page, and has pre-selected both the person and the Drug Test category for you.

That’s all there is to it! You’ve learned how to go from logging in to ordering multiple services for users in your organization. We have many other tutorials an guides to help you get started using StaffGlass. If you’re interested in learning more, please visit
our knowledge base. Thanks for reading and for using StaffGlass!